
Day 1:
Leonard (a redneck guy with ammo and a truck), Karl Dracomortat (a "wampyr" hunter), and Jim (a neo-samurai) learn from a nearby settlement that there are nasty things coming out of Red Mesa, a plateau much like Devil's Tower, rumored to have once been the site of some (no longer) secret military base.
They are offered gas, ammo and food if they will go investigate. They do so, and find that an explosion has laid open a way into a tunnel system in the lower part of the "tower", and it's large enough to drive the truck through. They go down the tunnels, encountering some debris along the way, which they remove by hitching a rope to the debris, then pulling it back with the truck, and spreading out the rest of the junk. They then proceed, finding themselves in an area where the lighting still works (if flickering a bit), and there are ventilation fans running. They also find a grisly scene where it looks like two dead scientists have been chewed on -- and a third body has been charred, tangled in the wiring of an electric vehicle pushed over onto its side.
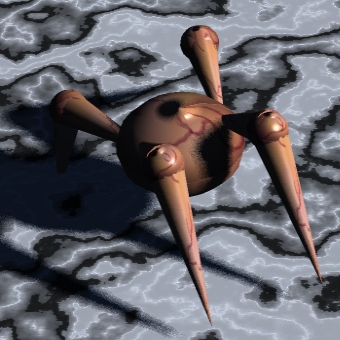
Hiding in a security station are Barney (a guard employed at the complex), Dr. Liebowitz (a biology scientist and doctor) and a coyote that our heroes take to calling "Woofie". There's a short confrontation as Barney thinks that our heroes are looters, but at last it becomes clear that they're here to deal with the "monster problem", and the two groups join forces. They spend some time rummaging through the supplies and ruins at the security station, and then take places as they spot some strange creatures coming down the tunnel -- which look suspiciously like basted turkeys crawling along the floor. One of them leaps up and latches onto the coyote's nose, but the coyote manages to make a snack out of the creature. Two more get pasted by Leonard's shotgun, while Dracomortat takes out another with his Colt Peacemaker single-action revolver. Barney and the coyote try to track where the creatures came from, but the trail abruptly ends for no apparent reason.
At this stop, there's a radioactive spill. They find some military rations, but Dracomortat is suspicious enough to have the doctor check it for radioactivity. Sure enough, it's radioactive. Leonard, however, seems to care naught about "radioactivity" and chows down on some pre-heated pork-and-beans. Fortunately, he suffers no ill effect.
The heroes spend some time discussing what to do next, as they find out that if they go up this elevator, there will be a gun turret waiting for them. At last, Jim uses a power-loader to move crates and junk onto the elevator to serve as a barricade. Jim, Barney and the coyote go up the elevator to check on the turret, after an initial test of sending a flaming crate of gas up to see if the turret reacts to the motion of the elevator or to heat. (No result.)
When the brave trio gets up to the next floor, at first there is no reaction ... but as soon as they peek over, the belt-fed autoshotgun turret starts firing! The coyote rushes past the turret and into a room just behind it, while Jim manages to peg the turret with a well-aimed knife.
The turret's gunfire smashes a glass door, sending broken shards all over the floor, forcing the coyote to keep in place, or else he'll cut his paws on the glass. Jim, however, makes a heroic dash underneath the turret to its blind spot, then leaps up and grabs the barrels. In a feat of strength (and thick gloves), he manages to jam the barrels, then rams his knife into the gun machinery and digs around. A black ichor begins to seep out ... and bits of ... brain material? The turret is rendered inactive.
Meanwhile, the elevator starts to go down, as the others down below have hit the "return" button. Barney starts riding down, and can hear chittering below ... for while this battle was going on upstairs, suddenly a bunch of mutant rats have been spilling out down below! Dr. Liebowitz, Dracomortat and Leonard scramble for the truck, Dracomortat getting dragged by the bumper a bit before he can scramble in. They flee from a swarm of rats, with Dr. Liebowitz driving the truck. They manage to paste several rats chasing the truck, and then Leonard lights a stick of dynamite to toss back to finish the job.
It would have been a perfect plan, except that Liebowitz sees more rats ahead ... and opts to stop the truck, then go into reverse ... right over the tossed stick of dynamite!
The resultant explosion sets off some secondary explosions in the tunnel system, sending a fireball rushing down the tunnel and frying the horde of rats ... just as Barney comes down. He sees a fireball rushing past, lots of flaming rats ... and just hits the "up" button.
Meanwhile, the truck is totalled, and only through a miracle do the occupants survive ... though Dr. Liebowitz is mortally injured by the blast. At last, the others come down and find them (following the trail of crispy roadkill), and drag them out of the truck, putting out the flames and making sure the dynamite is kept clear. They take the wounded and the supplies back to the elevator, and apply some "fast-heal" kits to them. They ride back up the elevator to the Biological Research Level, where Liebowitz, in his final moments, patches up his fellows to the best of his ability ... then passes on while taking a moment's rest. The coyote finds a dismembered monkey head with the cap of its skull gone, exposing the brain. He plays with it. When the brains spill out, he rolls around in the mess. No one, fortunately, loses their lunch when seeing this.
The heroes set up camp on this level, finding some more medical supplies, as well as some scattered notes, which they puzzle over.
So ends the session, as they try to recover from their wounds, planning their next move...
 At last, the heroes load up and head further down the tunnel, back to the elevator station to the higher levels of the complex. They encounter another headcrab along the way, and dispatch it. Then, when they're just at the next stop, they encounter a large mutant rat in the middle of the road, and two more "head-chickens" (as the Posse dubs them) drop out of thin air, one landing right on Jim's head, and the other landing on top of the truck. A quick reaction by Leonard results in the head-crab on top of the truck being knocked off by braking fast, then the head-crab and the rat get squished under the wheels, while Jim thinks fast and pulls the head-crab off his head and tosses it under the tires of the truck while it's still moving.

Dead Lands, Dead Lands: Hell on Earth and Dead Lands: The Weird West and characters and features thereof are trademarks of Pinnacle Games, and their use here does not constitute a challenge of trademark status. This site is by no means official, and should not be considered representative of the quality of the products of Pinnacle Games. With the exception of the "Dead Lands" logo, and except where otherwise noted, all artwork and all articles on this page are (c) by T. Jordan "Greywolf" Peacock, and may not be reproduced without permission.