

|
Photographs showing assembly of some of my paper ship models (which can be
found here).
|
|

|
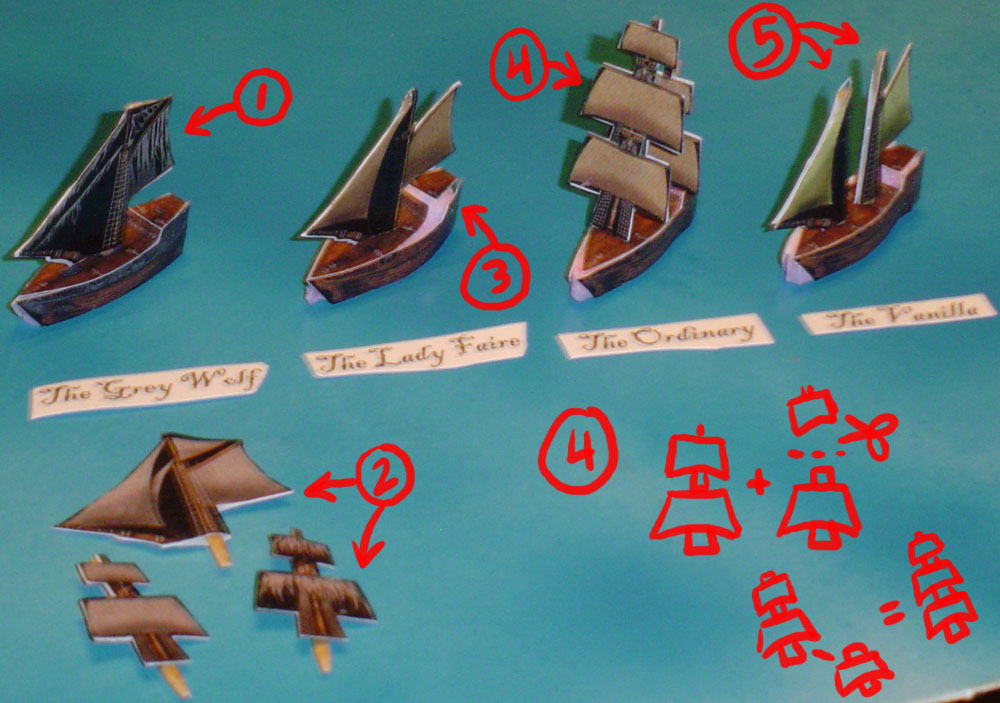
Assembled Ships
A fleet of paper ships assembled from my first "paper ship" PDF file. The far left one, the Stormstalker, is meant to resemble a toy I have called "Captain Cutlass's Stormstalker" - model 3620 from the Mega Bloks "Pyrates" line. While it faintly resembles a PotSM sloop, it sports a couple of square sails in addition to the stay sail and gaff sail. None of the ships in the CSG will look quite like it on the table, so I decided to make my own. And then ... so much space was left on the page, I figured I'd make a few more, too. |
|
Foam Board
First off, I recommend getting some of "the pink stuff" - in this case, foam insulation board, which can be picked up at most hardware stores. A sheet of this would last a very, very long time if you're just making little sloop models with it - but I use the stuff far more often to make islands, dungeon boards, and even the hull for a Barbary Coast Raider galley. The biggest trick is transporting it home in one piece. (I usually end up having to cut it in half to transport it home.) |
|
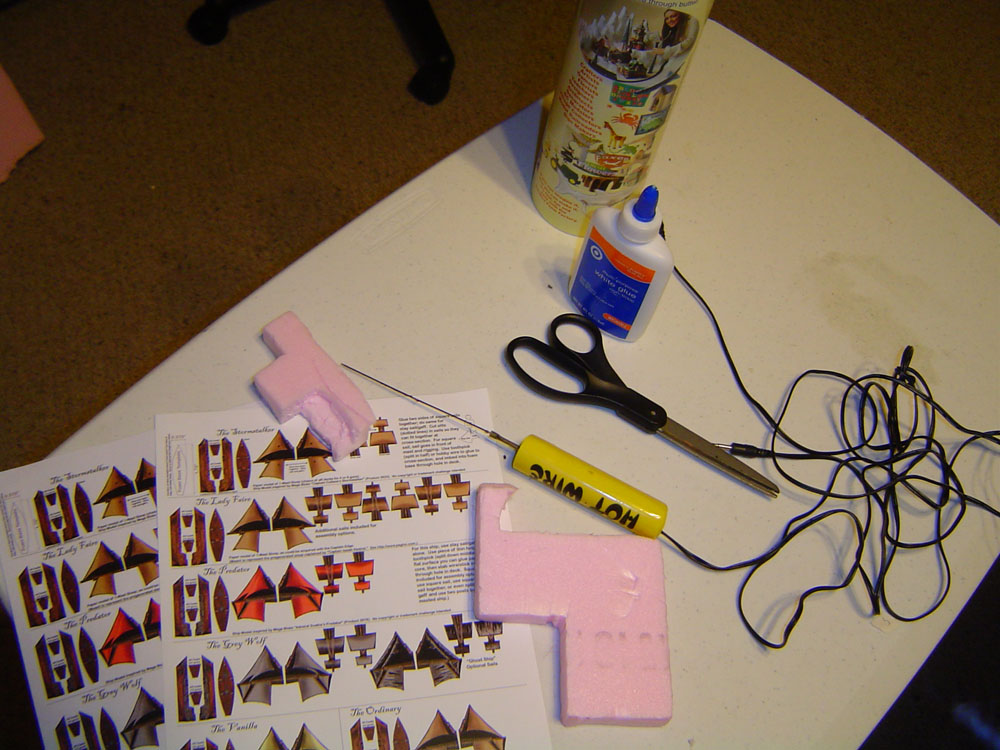
Foam Tools
Next, you'll need something to cut the foam with - either a hobby knife or box cutter, preferably with a nice, sharp blade - or else a hot wire foam cutter. Some department stores will sell foam cutters in the craft/hobby department, particularly if they sell the green foam used for floral arrangements - but most of those are battery powered, and relatively fragile. I picked this plug-in hot wire cutter up at my local hobby store. (This particular one is the "Hot Wire Foam Factory Hot Knife with AC Power Supply" from http://www.hotwirefoamfactory.com.) Also, I've printed off the PDF onto cardstock and paper. I prefer the cardstock, by far. |
|
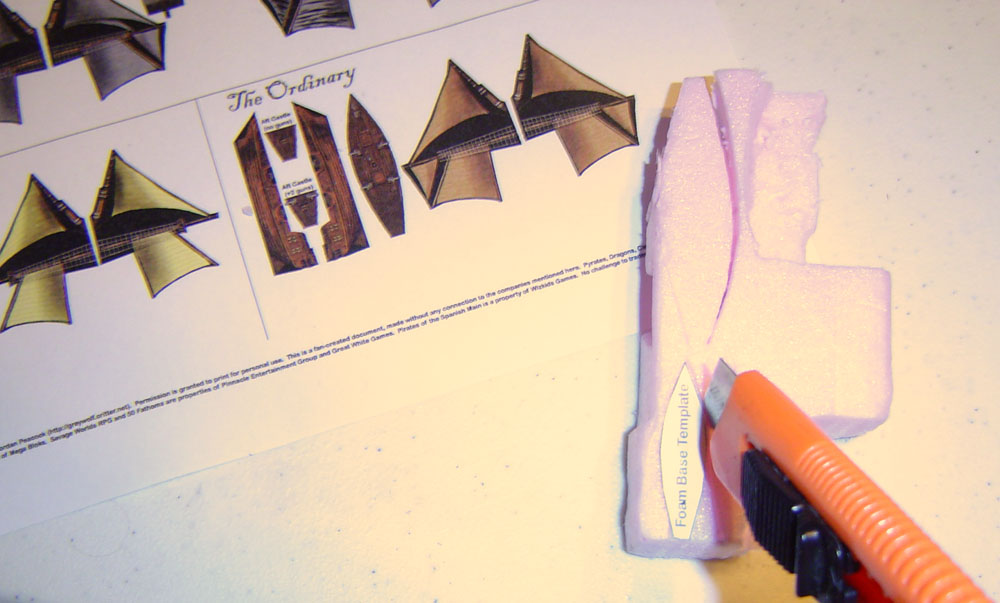
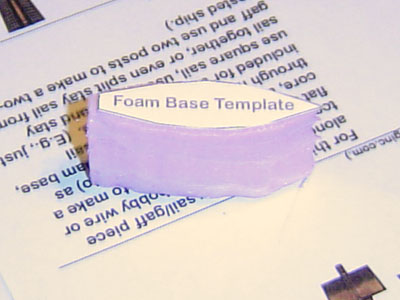
Foam Template with Knife
The first step to building the sloop is to cut out the "foam base template" and use that to trace a segment of the foam insulation board, then cut it out. A hobby knife is probably the most straightforward (and the cheapest) way to do it ... provided you have a sharp blade. If the blade is dull (which, alas, this one is - and I can't figure out where I put the spare blades!) then it will tend to tear up the foam something terrible. And don't forget: Cut AWAY from yourself! |
|
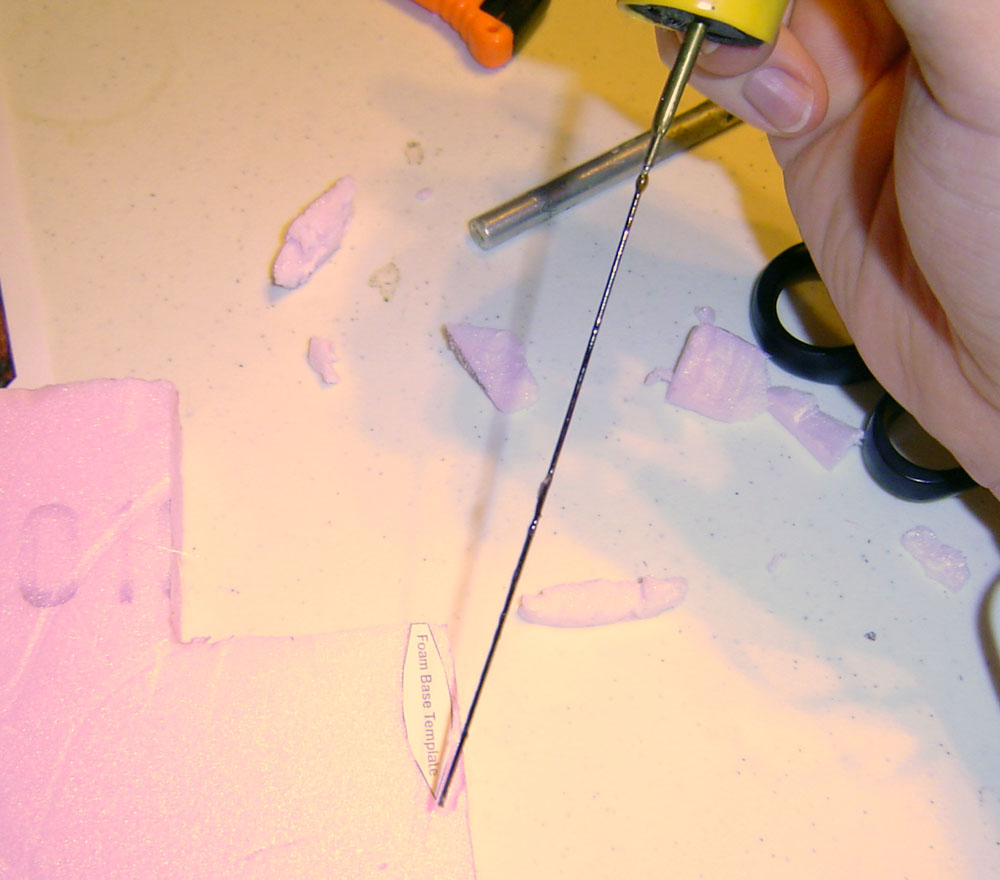
Foam Template with Hot Wire
An alternative is to use the hot wire to cut the foam. One thing to keep in mind is that the hot wire "cuts" by melting the foam, so we're not talking laser-cutter precision here. You'll need to hold the tool out from the edge where you want to cut by a few millimeters, and it will still melt its way in toward the line (and probably past it on occasion). Maybe it's just my imagination, but the hot wire seems to be hotter when cutting with just the tip than when I bring the length of the edge in contact with the foam. In any case, be prepared to have to start over a few times, as this is a less-than-precise art. Oh yeah, and don't forget to unplug when you're done. |
|
Foam Base Template
Here's a sample foam base cut out. It's far thicker than it has to be. In this case, I can fairly safely cut the piece in half and then do a bit more trim work to have myself two base pieces. |
|
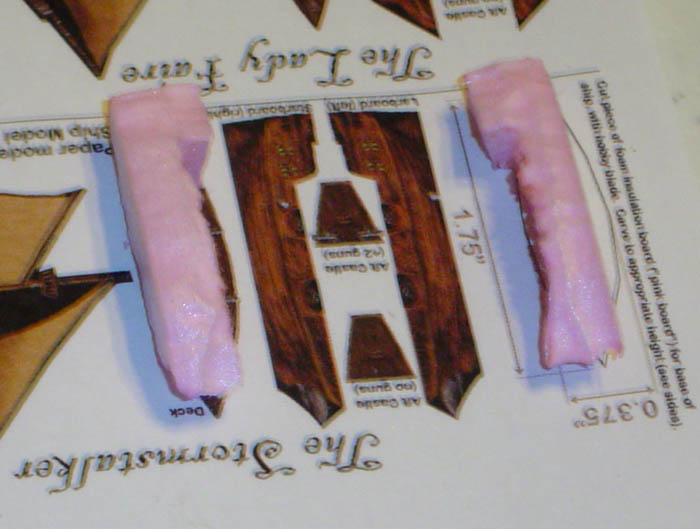
Foam Bases
Here are two foam bases cut using the hot wire. It's a far-from-smooth job, but for my purposes, it should still do the job. I've compared them to the side images of the ship's hull on the PDF printout, to determine the thickness I want, and to make sure that they more-or-less line up. |
|
Stormstalker Hull
Next, cut out the deck, aft castle, and side hull pieces. You have a choice of two aft castle pieces - one with a couple of extra cannons printed on it, and one without. To my regret, it's pretty hard to tell the difference when it's printed off, so don't sweat it. Just think of it as a spare in case the tiny little piece slips from your hands and disappears into the carpet on the first try. (Not that anything like that ever happens to me, of course. No sir.) Part of the back of the deck will actually have to be trimmed to fit the foam. It also helps to bend and curve the side hull pieces before gluing them to the foam base, so they won't tend to peel away before the glue dries. |
|
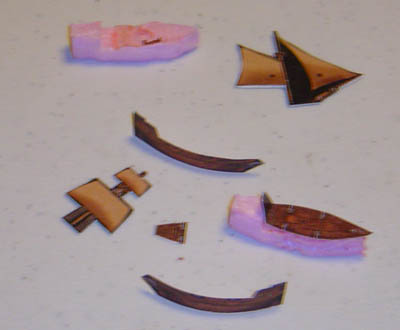
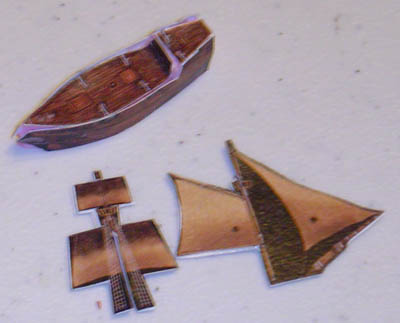
Stormstalker Components
For the Stormstalker, you'll need to cut out the stay/gaff sail pieces and the square sail pieces, and glue the corresponding pieces together. You'll then need to cut a slot (as pictured) out of the bottom of the square sail piece, and another slot out of the top of the stay/gaff sail. (This will probably result in the loss of half of the tiny "crow's nest" depicted on the stay/gaff sail. Don't worry. Nobody's likely to notice anyway.) These two pieces should then fit together at a cross-section, which can then be glued down onto the deck. |
|
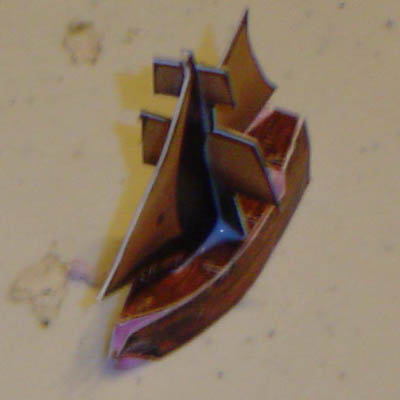
Stormstalker Assembled
With a good dab of white glue, you can affix the mast in place. Optionally, you might want to paint exposed pink foam areas with black paint - or perhaps a dark brown, to better fit the model. Don't forget the bottom, in case you ever want to tip the model over on the table to represent a capsized ship. While the CSG sloops have removable masts, I figure that it's less trouble to just affix it permanently here. If you want a "battle-damaged" version of your sloop, sans mast, you could always just make yourself another ship, and leave the mast off. |
|
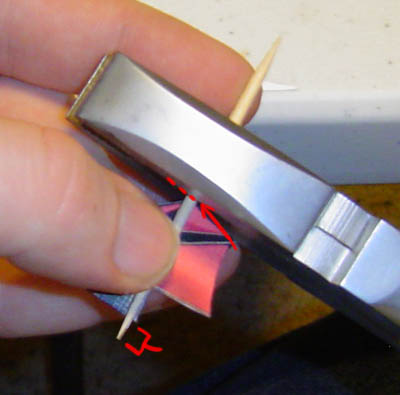
Measuring Toothpick Mast
Another model in the set, the Predator, is based off of "Admiral Scathe's Predator" - Model 3619 from the Mega Bloks "Pyrates" line. The toy is pretty much the same, only with a different color scheme, different accessories, and a slightly different sail arrangement for the most part. The Predator just has the stay sail and gaff, with a smaller sail (a spanker? a top-gaff? not sure what to call it) to complete the "triangle." It's closer to the look of a standard sloop in the CSG. Paper alone won't hold the mast up very well, so you'll need some toothpicks to serve as reinforcement. Be sure to measure off the length of the sail (along the mast), but also let one pointy end of the toothpick extend below the base of the sail. The sharp pointy end will be going into the foam. You can clip off the top with some wire cutters - or even some standard scissors, though I don't imagine it's good for the blade. |
|
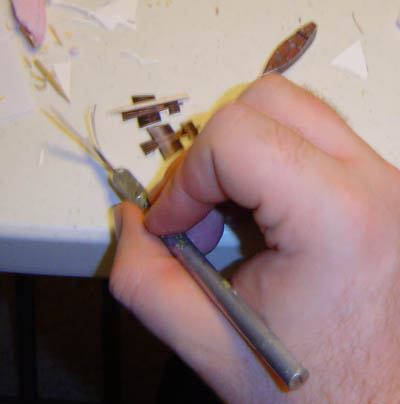
Shaving Toothpick Mast
Remember: cut away from yourself! The hobby knife can be your friend, or the hobby knife can be your ticket to the emergency room. Anyway, you might be able to get by using a toothpick as-is, but I have found it worthwhile to take some time to "shave" down flat surfaces on the toothpicks to glue paper to. In the case of gluing a toothpick mast to a square sail, you'd only need to shave one side flat, and glue it to the back of the sail. |
|
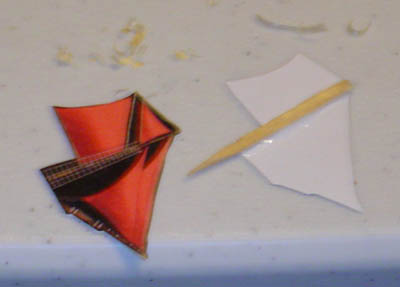
Mast Assembly
For the stay/gaff sail piece, putting the toothpick on one side or the other would be asymmetrical and unsightly - so instead I shaved it more-or-less flat on two sides, and then glued it between the two stay/gaff sail halves. |
|
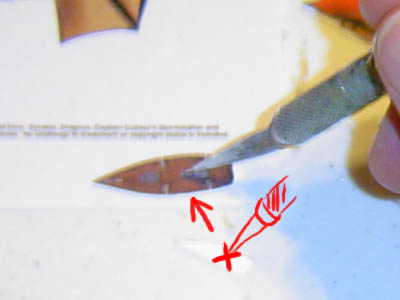
Cutting Deck Hole
If you plan on inserting the mast via toothpick (or wire) into the deck, it's best to cut an opening into the deck - a couple of crossing slits (+) will do the trick - before you glue the deck piece onto the foam base. This way, the toothpick point has something to go through. (Trying to force it through cardstock without cutting a hole first is just going to ruin the foam and paper.) |

|
Trimming Bottom
It's not unlikely that a little bit may poke down through the bottom. Just pull the toothpick back out, snip off the very point (which you won't be needing anymore anyway), and then re-insert. You can either glue the toothpick in place, or else just let the pressure from paper and foam hold it in place. The latter option will give you the chance to remove the mast to represent "battle damage" or perhaps even to swap out optional sail designs, but eventually, after a few uses, the "grip" of the foam will start to weaken - so you may eventually have to glue it in place anyway. |
|
Assembly Options
Since I had the space to fill, I put in a few more slight variations on the original design on the PDF sheet, and a few extra masts. |
And a few other variations could be made with the same set. Given a bit more time, I may even go back to make some modifications to the PDF, to use up a little more of that white space. For instance, I may as well make a proper three-sail mast, rather than forcing someone to cut-and-paste to get something resembling the same effect. And then, most of the pieces could probably use a thicker black outline, to make the cutting-out procedure a little more forgiving. And, it couldn't hurt to have a few more "ghost ship" sails, or perhaps a "battle-damaged" hull, or maybe a few pirate flags or banners. I also need to make a separate set of models for some of the other ships in my fleet - most of them two-masted. Good luck, and I hope you have fun making your own little ships and using them in Pirates RPG battles!
|
|
|
|
|